Tip Number: 288
<Prev Next>, 10th May 2016,  Original PDF Version
Tip Number: 288
<Prev Next>, 10th May 2016,  Original PDF Version
This Technical Tip is to alert customers with the Unified Communications Module (UCM) V2 (Avaya ID 700507449) that a firmware upgrade may be required. Early manufactured UCM V2 cards that require a firmware upgrade may not start up correctly.
Affected modules are identified by PCS number, which can be determined from the label on the packaging, or from the manufacturing label on the module.
Cards identified as PCS 1 will need to be upgraded.
Cards identified as PCS 2 may need to be upgraded. In both cases, follow the procedure to determine the current UCM V2 firmware version.
If the UCM V2 is installed in an operational IP Office system, the firmware version can be checked using System Status Application (SSA). Navigate to the UCM status screen and check the BIOS version field displayed. The latest version is "coreboot-4.0-6271-ge96f4b1/ucmv2-0.002.5".
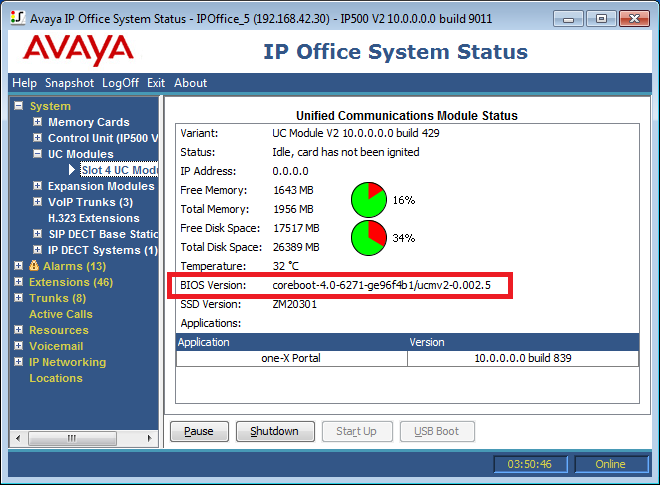
If an earlier version than the above is displayed, it is recommended that the upgrade process is followed to upgrade the firmware.
Note: The BIOS version can only be accessed when the UCM V2 card is shutdown. If the IP Office main unit is re-started while the UCM V2 is running, the BIOS Version field will not be populated in SSA. In this case, the UCM V2 must be shut down and restarted for the field to be displayed.
The upgrade procedure requires the following:
An IP Office IP500 V2 Control Unit, running software release 9.1 or later.
A PC running the IP Office Manager application and terminal emulation application (PuTTY or Tera Term for example).
An RS-232 cable, with 9-pin male connector for the IP Office connection and appropriate connector for the PC COM port connection (9-pin female).
The UCM V2 Firmware image file, named "UCMv2Flash.bin" from the Avaya Support web site.
Install the UCM V2 module into the IP Office V2 Control Unit.
Connect the RS-232 cable to the IP Office V2 Control Unit RS232 port, located on the rear of the unit and to a COM port on the PC.
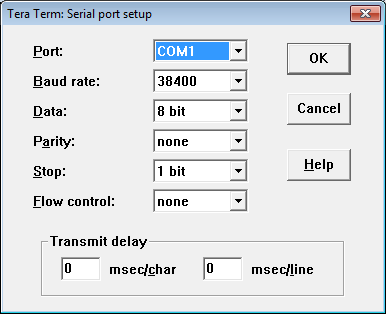
Configure the PC terminal emulation software, selecting the correct COM port and setting the serial port characteristics to 38400 baud, 8 data bits, 1 stop bit, no parity and no flow control. For example, if using Tera Term:
Power on the IP Office Control Unit.
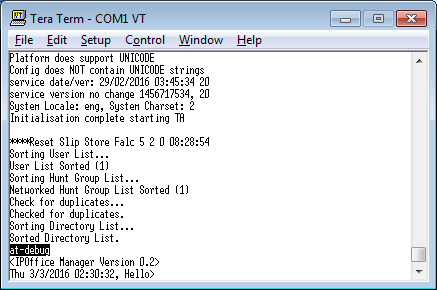
Hardware initialization messages should be displayed on the terminal window. After the message "Initialization complete starting TA" has been displayed, enter the following command:
at-debug
Observe the command prompt showing the date and time:
Commands which access the UCM V2 flash memory can only be executed when the card is in the shutdown state. This is identified by both front panel LED's being extinguished (except for the lower LED orange flash every 5 seconds). If the UCM V2 is not shut down, then press the front panel button on the module for at least 2 seconds and wait for the front panel LED's to show the shutdown state.
For the following DTE port commands entered in the terminal application, where the slot number of the UCM V2 module is required, the numbering is 0 (left hand slot when facing the unit) to 3 (right hand slot). In the example, the UCM V2 is located in slot 3. Enter command:
appsproc <slot> config
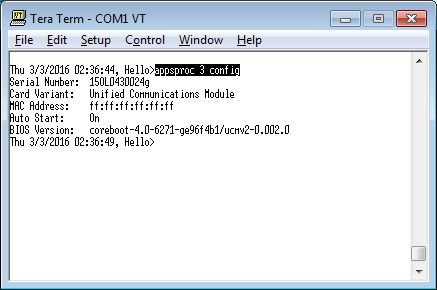
Check the BIOS version field for the required action:
coreboot-4.0-6271-ge96f4b1/ucmv2-0.002.0 - upgrade required
coreboot-4.0-6271-ge96f4b1/ucmv2-0.002.4 - upgrade required
coreboot-4.0-6271-ge96f4b1/ucmv2-0.002.5 - no upgrade required
If no upgrade is required, the procedure can finish here. Otherwise, continue with the next steps.
Start the IP Office Manager application
Select "File", "Advanced", "Embedded File Management"
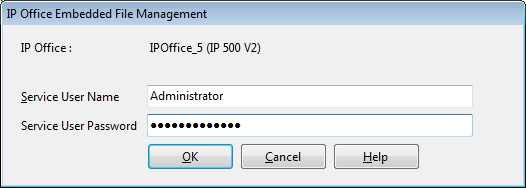
From the list of units, select the IP Office system containing the UCM V2 card to be upgraded. Select OK.
Enter the Service User Name and Password in the dialogue displayed:
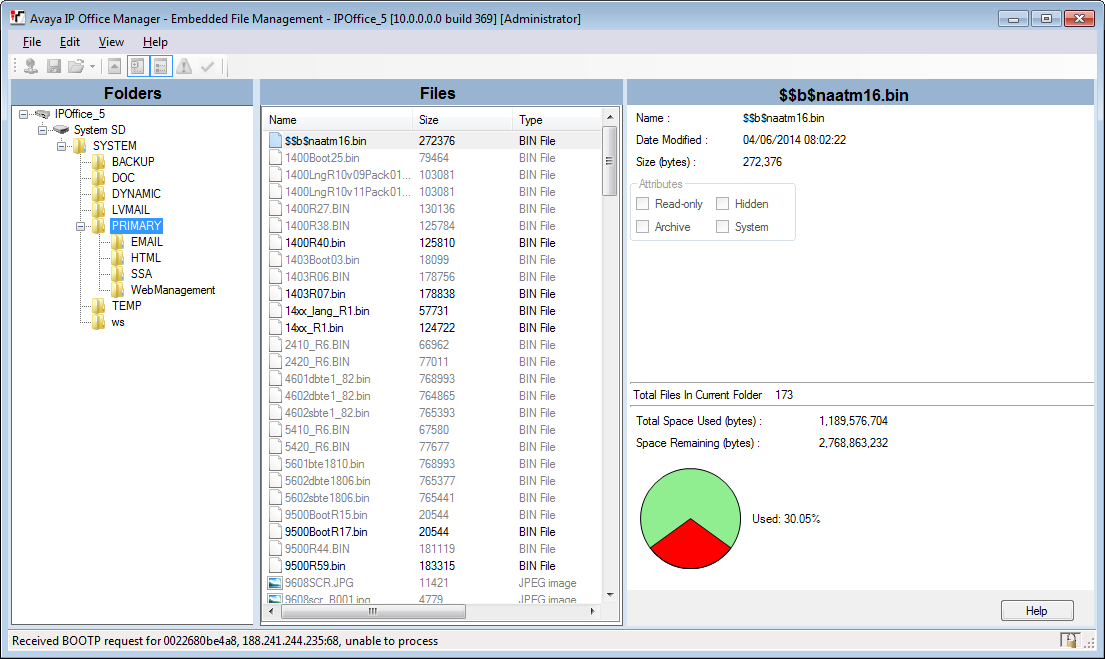
Navigate to the System SD, SYSTEM, PRIMARY folder:
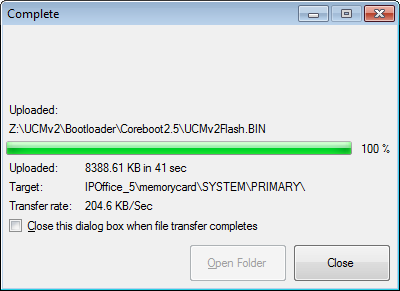
Drag and drop the UCM V2 firmware file, UCMv2Flash.bin, from its folder on the PC into the Primary folder on the SD card. A dialogue will show the progress of the transfer; when complete select Close:
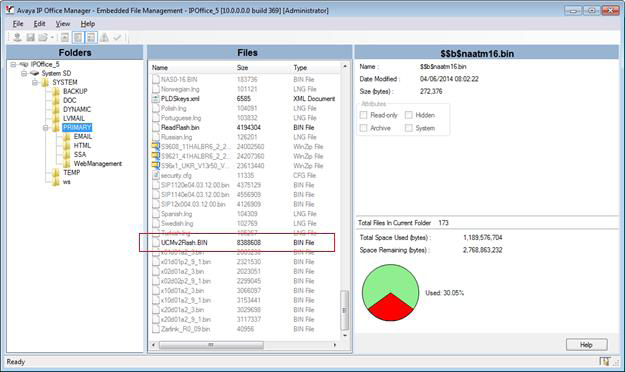
Verify the file is present in the "PRIMARY" folder:
Change IP Office Manager back to Configuration Mode, by selecting "File", and the "Configuration" menu option.
From the terminal window, enter the command:
appsproc <slot> flash-upgrade
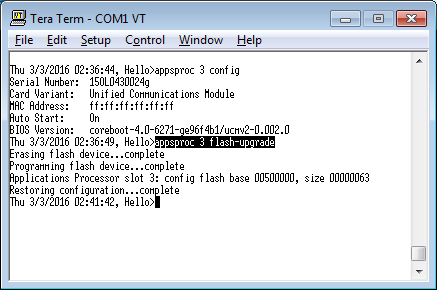
The erase and programming cycle will take approximately four minutes. On completion, enter the appsproc
coreboot-4.0-6271-ge96f4b1/ucmv2-0.002.”:
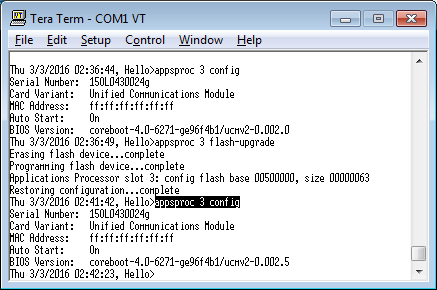
The UCM V2 firmware upgrade is now complete. The card can be returned to service and powered on if previously commissioned, or the software installation procedure can now be followed to commission the card.
Early UCM V2 cards that have been running without issues in customer systems to date may still continue to start-up correctly without the Firmware upgrade. However, Avaya recommends that the firmware upgrade is performed on all affected cards.
The updated firmware is available from the IP Office 9.1 Downloads section of the Avaya Support web site: https://support.avaya.com