Having determined the new systems IP address and configured your PC to be able to connect to addresses in that range:
1.In your web browser:
a.Enter the control unit's current IP address in the browser address bar.
b.Click IP Office Web Manager. The address shown is now similar to https://192.168.0.42:8443/WebMgmtEE/WebManagement.html.
2.The connection as this stage may not be seen as secure. Follow whichever steps your browser provides for continuing with an unsecure connection.
•For example, in Chrome, select SHOW ADVANCED and then Proceed.
•Once the system is installed, its security certificate can be downloaded to remove the need for this in future. See Adding the System Certificate to a Browser.
3.At the login menu, login using the default name and password Administrator.
4.You are prompted to change the default passwords.
•Administrator Password: This password is used for access to the system's telephony configuration.
•Security Administrator Password: This password is used for access to the system's security configuration. Note that by default the administrator password above can also be used for security configuration.
•System Password: This password is used for system upgrades using IP Office Manager and can also be used for connecting System Monitor.
5.If a license agreement is shown, read the license and then click Accept and OK.
6.Click on the System icon.
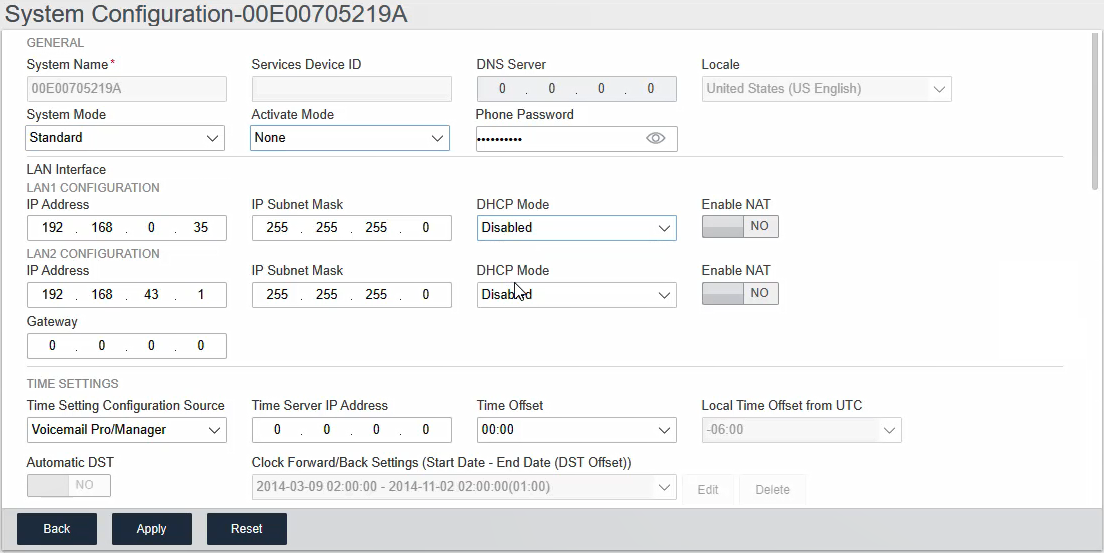
7.Enter the details that you want the system to use. For full details of the System options, see System Settings. At this stage, the key values are:
Setting |
Description |
|---|---|
System Mode |
For an IP Office Essential Edition or IP Office Preferred Edition system, select IP Office Standard Edition. |
System Name |
Used to help identify and access the system. |
Retain Configuration |
This option appears if this menu is rerun on an existing system. If selected, the system attempts to retain as much of the configuration as is compatible with the other selections made in this menu. |
Locale |
This sets a range of settings to match the telephony requirements of that selected country. It also sets the default language for the system and all users. |
Default Extension Password |
This password is used for the initial registration of IP extensions. |
Under Centralized Management |
This setting is used for branch systems in a Avaya Aura network. Refer to the separate branch installation documentation. |
The following settings are used to configure the systems IP address settings: |
|
Public LAN Interface |
This option performs two roles: a.It is used to display the IP address settings of each of the system's two LAN ports. LAN1 matches the port on the control unit labeled LAN, LAN2 matches the port labeled WAN. Check that these settings are as required. b.The final selection is used to set which of the ports is connected to the customer network that should be used for external internet access via the customer firewall or similar. The Gateway address of that LAN is then added to the system's IP routes as the default IP route. |
IP Address |
Set the IP address of the system on the currently selected LAN interface. |
IP Mask |
Set the IP address mask of the system on the currently selected LAN interface. |
Gateway |
Set the IP address of the external router. |
8.When the system settings are set as required, click Apply. The dashboard now contains a series of other icons for working through the initial configuration of the system.
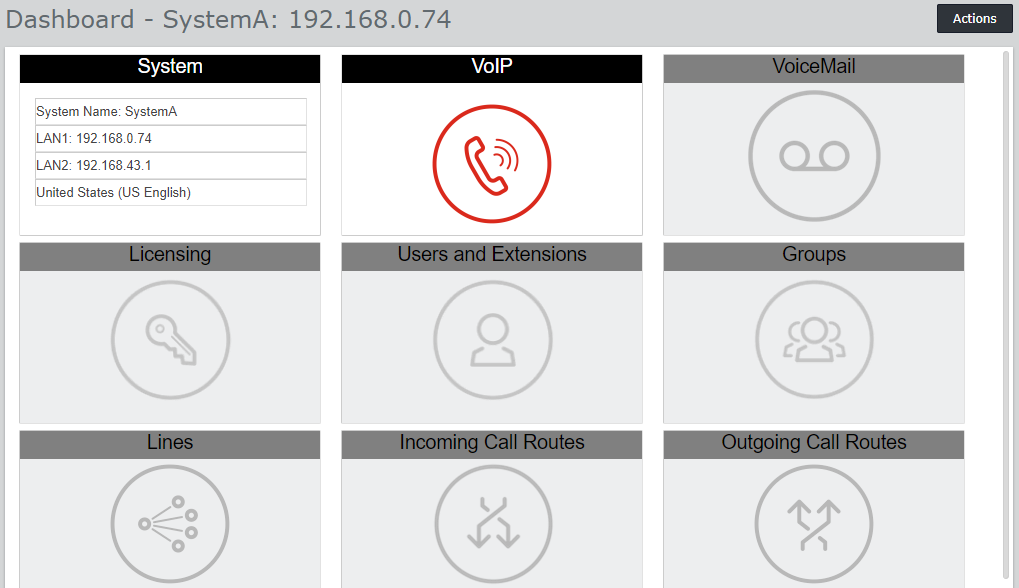
9.The next icon to click is highlighted in red. After you complete each set of settings, the icon in the panel is replaced with a summary of the key settings and the next icon is highlighted. You can return to previous panels if you want to make further changes to their settings. For details of the individual panels see Dashboard Wizard Menus.
10.Once you have completed all the steps of the wizard, click the Save to IP Office link shown in the yellow bar at the top of the window.
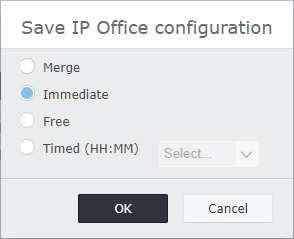
11.The save configuration menu is displayed with a recommended save setting based on the changes you have made. For a new install this is likely to be a save using an immediate reboot of the new system. Accept the recommended setting and click OK.
12.After the reboot, continue the system configuration using the system's new IP address.