Auto attendant 1 is present in the system configuration by default and cannot be removed. However you can add up to 8 more auto attendants.
Before adding the auto attendant, you need to have worked out the following details:
•The times of day during which the different possible greetings (morning, afternoon, evening and out of hours) should be used.
•The actions that the auto attendant should offer to callers during each of those time periods.
1.Click Incoming Call Management in the menu bar and then click Auto Attendant.
2.The list of existing auto attendants is displayed. Click New Auto Attendant.
3.The initial menu options for an attendant are requested. Set these as required and then click Save
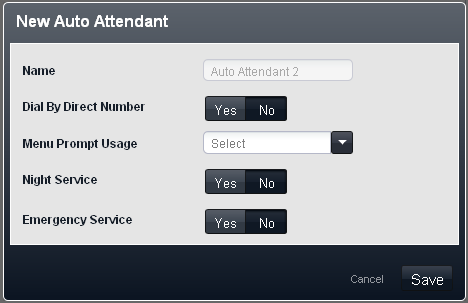
•Dial By Direct Number: Default = On for the first default auto attendant. Off for other auto attendants.
This setting affects the operation of any key presses in the auto attendant menu set to use the Dial By Number action.
•If selected, the key press for the action is included in any following digits dialed by the caller for extension matching. For example, if 2 is set in the actions to Dial by Number, a caller can dial 20 for extension 20.
•If not selected, the key press for the action is not included in any following digits dialed by the caller for extension matching. For example, if 2 is set in the actions to Dial by Number, a caller must dial 2 and then 20 for extension 20.
•Menu Prompt Usage: Default = Each menu uses own prompt.
Each time profile option used by an auto attendant can have its own set of actions and therefore may require a separate actions prompt to be played after the appropriate greeting prompt. The settings Each menu uses own prompt does that. Alternately one of the menu options can be selected as the menu option prompt played at all times of day.
•Night Service: Default = On.
If selected, when the system is in night service, the auto attendant will switch to using its out of hours greetings and menu actions. If not selected, when the system is in night service, the auto attendant will continue using the greetings and menu options as determined by its own time profile settings.
•Emergency Service: Default = Off.
This field indicates when the auto attendants emergency greeting option has been enabled by someone using the auto attendant. The field can also be used to disable the emergency greeting without having to go through the auto attendant menu.
4.After clicking Save, a summary menu is displayed. Click More Settings >>.
5.The detail settings of the new auto attendant are displayed.
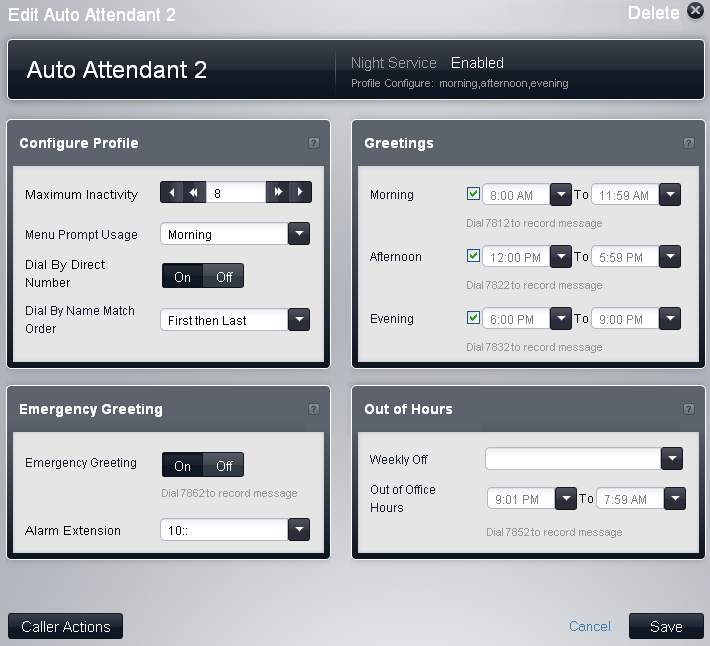
6.Adjust the settings as required for when the auto attendant should operate in its morning, afternoon, evening and out of hours modes. Note the numbers shown in the menu. They are internal numbers that can be dialed to record the auto attendant prompts.
•If the greetings time periods overlap, the greeting and actions used is the first one that is valid in the order morning, afternoon or evening. For call outside those times, the out of office settings are used.
7.Click Caller Actions. The menu for setting which keys presses callers can use and the action for those presses is displayed.
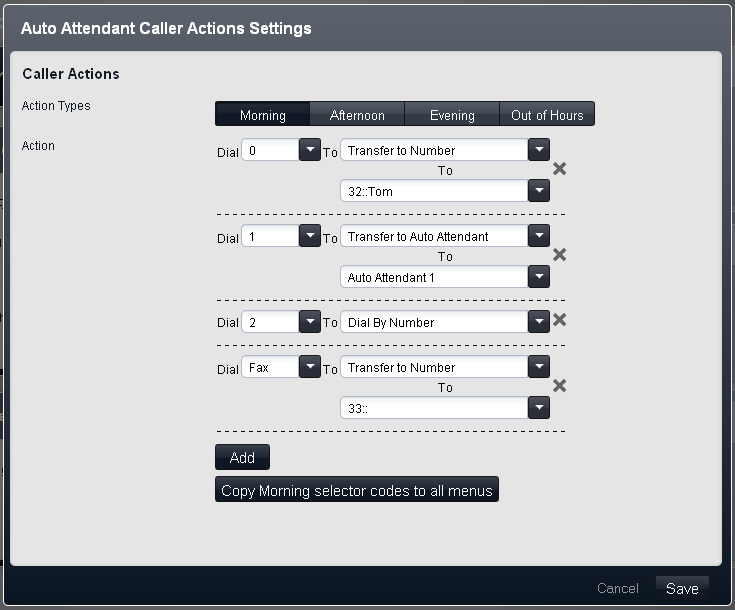
8.You can configure different sets of key presses for each time period. If you want them all to be the same, you can set up one time period and then use the copy button to copy the same button settings to all time periods.
•To remove a key press, click on the X delete icon.
•To add a key press, click Add and select the key press that the action should be used in response to.
•You can add a Fax option. The system uses that as the destination for any calls where the auto attendant detects incoming fax tone rather than a caller. For this action select Transfer to Number and set the destination as an extension that has had its equipment type also set to Fax.
9.Ensure that you have made notes of the settings as you need to include the options in the prompts recorded for the auto attendant.
10.Click Save. The auto attendant settings are displayed again.
11.Click Save again. The list of existing auto attendants is displayed.
12.You should now record greetings for the auto attendant.
13.Test operation by dialing the internal access number for the auto attendant that you have just created.
14.Once you are satisfied with the operation of the auto attendant, you can use it as the destination for external lines or for line coverage.