Tip Number: 258
<Prev Next>, 12th December 2013,  Original PDF Version
Tip Number: 258
<Prev Next>, 12th December 2013, Original PDF Version
Avaya has received a number of reports where the Preferred Edition Voicemail has shut down on the Unified Communications Module (UCM). Avaya have conducted a thorough investigation of the issue and established several measures to resolve the issue and minimize customer impact.
This Technical Tip is to inform customers of the issues and the specific actions that should be taken. For further details on the issue please refer to the Product Support Notice (PSN) referenced later in this document.
In certain scenarios, the Solid State Drive (SSD) on the UCM reverts to "write protect" mode as early as a few weeks of use. An affected UCM can shut down the Preferred Edition Voicemail.
Modules affected by this issue can be identified within a serial number range of 13WZ31xxxxxx and 13WZ43xxxxxx.
Also, modules exhibiting this issue will have PCS level 9 and PCS level 4 for the onboard SSD. The PCS level for the UCM can be located on either the UCM shipping box (see figure 1) or on the UCM itself (see figure 2). The PCS for the on-board SSD is located on the top right of the blue sticker that is attached to the drive (see figure 3).
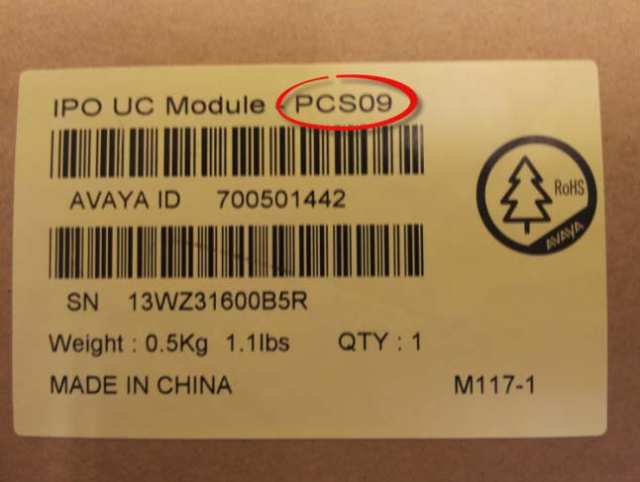
Figure 1
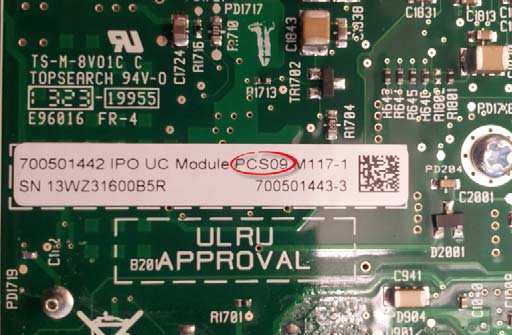
Figure 2
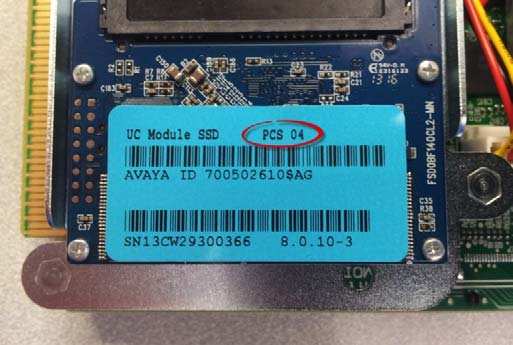
Figure 3
A PSN is also being issued to address the fault that causes the SSD to revert to "write protect" mode due to a microcontroller firmware deficiency. Other components and performance of the IP Office control unit are not impacted.
The corrective action is to install a Critical Patch (CP) on the UCM through the UCM WebControl Application. The Critical Patch can be found at http://support.avaya.com.
The PSN associated with this Technical Tip is PSN004105.
This corrective action should be performed on all Unified Communications Modules that meet the serial number and PCS level prerequisites. Failure to perform this corrective action will leave the UCM vulnerable to incorrectly lock into a "write protect" mode and cause the Preferred Edition Voicemail to shut down. There is a risk of data loss if the unit goes into write protect mode if the procedure is not performed.
There are three situations that require that the Critical Patch (CP) be installed on the UCM.
UCM installed (no issue): If the serial number of the installed UCM falls within the range of potentially-affected units, Avaya recommends that the software fix is downloaded and installed on the UCM per the provided instructions.
UCM purchased but not yet implemented: Avaya recommends that the software fix be downloaded and installed on any existing current nonimplemented UCM stock in your inventory.
UCM units that are received coming from Repair/Distribution due to a RMA/DOA replacement: Avaya recommends that software fix be downloaded and installed on all UCM's that are received from Repair/RMA/DOA replacement.
If your UCM is installed and is currently experiencing this issue the UCM must be replaced. Avaya recommends that our channel partners create an escalation ticket. Partners may elect to follow the RMA/DOA process, if necessary. Additionally, if the customer account has an IP Office Support Services (IPOSS) with Advanced Parts Replacement (APR) contract they can follow the documented IPOSS process.
When preparing a new UCM for field deployment you should follow the procedures for igniting the module services and install the current software release ISO image via a USB key before you perform the SSD 'write protect' critical patch. These procedures are outlined in the IP Office Unified Communications Module 9.0 Installation and Maintenance Guide (Document 16-601011 Issue 07g) and in the IP Office 8.1 Installation and Maintenance Guide (Document 15-601011 Issue 06g).
The level of software that is pre-loaded on the UCM is identified by the light blue sticker that is placed on top of the SSD drive. In the example below the UCM is running release 8.0.10-3 of software (figure 4):
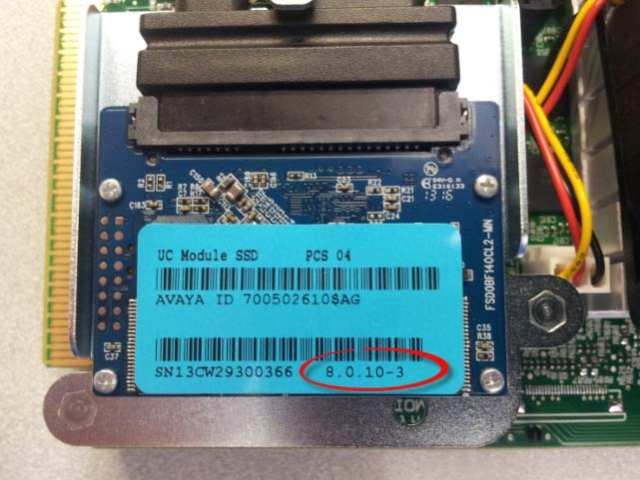
Figure 4
After the Unified Communications Module (UCM) has been prepared for field deployment you should proceed to apply the SSD Firmware Update Critical Patch.
To perform this firmware update patch you will need:
The SSDFWUpgrade-1.0.0-7.zip patch located on the Avaya support web site
Access to the UCM WebControl Application
The SSD Firmware Update Critical Patch does not affect the data stored on the SSD. However, Avaya recommends performing a back-up to a remote server if there is customer Voicemail or one-X Portal data residing on the UCM. This should be performed before proceeding with the installation of the SSD Firmware Update Critical Patch.
Launch the WebControl Application and login as Administrator.
In the 'Settings' tab, load the zip file in the Applications Software Repositories by browsing to the zip file and then press the 'Add' button.
In the 'Updates' tab under the 'Services' window install the new .rpms in the following order:
mailx
smartmontools
SSDFWUpgrade
Note: The SSD Firmware Upgrade package will NOT install properly if mailx and smartmontools are not installed first
Upon successful completion of the SSD Firmware Upgrade package the UCM will automatically power down. For cases where the SSD Firmware Upgrade is not required the installation of the .rpm files will not affect the system.
The UCM can be restarted via the System Status Application (SSA) (see figure 5) or by pressing the top button on the UCM module.
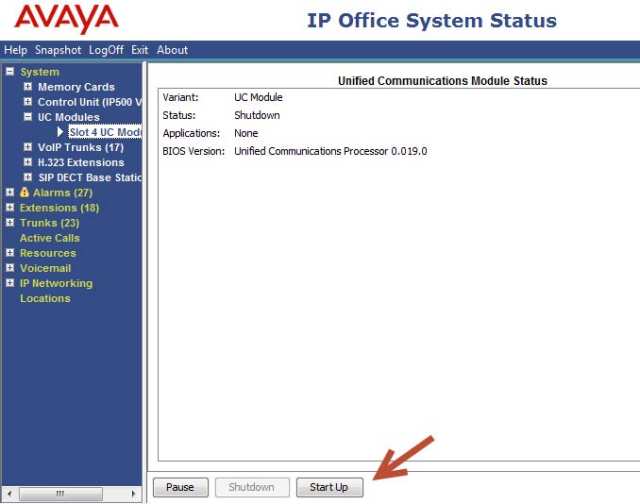
Figure 5
Once the UCM has completed the start-up process the diagnostic information will be displayed in the SSA (see figure 6):
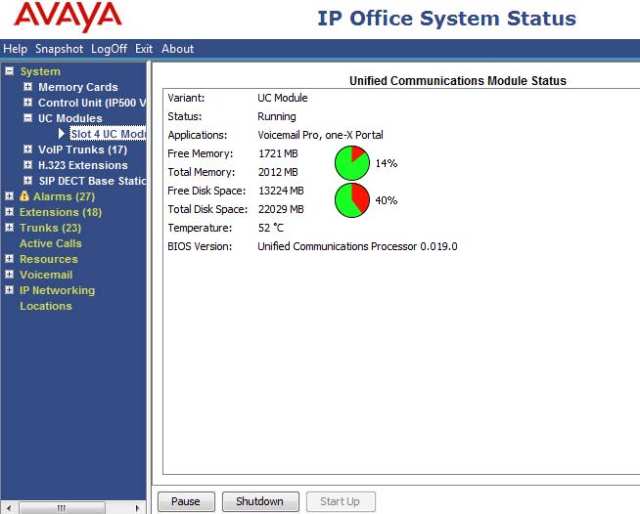
Figure 6
The success of the SSD Firmware package can be confirmed by viewing the 'Notifications' window on the WebControl Applications 'Home' tab. This will show one of four possible messages:
'SSD Firmware not needed. SSD version is Ver703.o'.
'SSD Firmware not needed. SSD version is S5FAR031'.
'SSD Firmware upgrade successful. Power cycle was completed to finalize the changes'.
'SSD Firmware upgrade failed'. In this case the UCM should be replaced.
At this point the UCM SSD Firmware Upgrade has been completed.
Launch the Web Manager Application and login as Administrator.
In the 'Settings' tab, load the zip file in the Applications Software Repositories by browsing to the zip file and then press the 'Add' button.
In the 'Updates' tab under the 'Services' window install the SSDFWUpgrade .rpm. Modules running Release 9.0 software already have 'mailx' and 'smartmontools' already installed and do not require an update.
Upon successful completion of the SSD Firmware Upgrade package the UCM will automatically power down. For cases where the SSD Firmware Upgrade is not required the installation of the .rpm files will not affect the system, the UCM will not have been shut down.
The UCM can be restarted via the System Status Application (SSA) (see figure 7) or by pressing the top button on the UCM.

Figure 7
Once the UCM has completed the start-up process the diagnostic information will be displayed in the System Status Application (SSA) (see figure 8).

Figure 8
The success of the SSD Firmware package can be confirmed by viewing the 'Notifications' window on the WebControl Applications 'Home' tab. This will show one of four possible messages depending on the SSD version that is installed in the UCM:
'SSD Firmware not needed. SSD version is Ver703.o'
'SSD Firmware not needed. SSD version is S5FAR031'
'SSD Firmware upgrade successful. Power cycle was completed to finalize the changes'
'SSD Firmware upgrade failed'. In this case the UCM should be replaced.
The UCM SSD Firmware Upgrade has been completed.
The corrective action should be performed on all Unified Communications Modules that meet the serial number and PCS level prerequisites. Failure to perform this corrective action will leave the UCM vulnerable to incorrectly lock into a 'write protect' mode and cause the Preferred Edition Voicemail to shut down. There is a risk of data loss if the unit goes into write protect mode if this procedure is not performed.
On most drives the upgrade takes less than 3 minutes to complete.
Yes but this is limited to the UCM and services. The Voicemail Pro and the one-X Portal applications will have to be restarted. After the SSD Firmware Package completes the UCM will power down and must be restarted from the SSA or manually pressing the top button on the UCM Module. All other call processing continues during the SSD Firmware upgrade, the IP500v2 system unit does not need to be restarted for the Firmware upgrade to take effect.
Yes. The script will determine if the SSD Firmware Upgrade is required. For cases where the upgrade is not required, the attempted installation of this upgrade package does not affect the system.
No. You must use the full installation image (.iso) and the USB Initiator method to upgrade between major releases. The 'upgrade.zip' file can only be used to upgrade within the same release. For example, you can use the 'upgrade.zip' file to upgrade from 8.1(x) to 8.1(y).