Most Avaya phones have buttons to which functions can be assigned. For some phones, additional buttons can also be added by attaching a button module to the phone.
Default Buttons and Button Numbering
The default button assignment depends on whether the system's Mode is set as Key or PBX.
•Key Mode
•01-02: Intercom Buttons
The first two buttons are used as Intercom 1 and Intercom 2 buttons for internal calls. This function is automatically assigned to the buttons by the system and cannot be overridden by the system administrator or extension user.
•03+: Line Buttons
Buttons 03 and upwards up to the system's Number of Lines setting are used as line appearance buttons for external calls. These cannot be overridden by the extension user.
•Other Buttons
Any additional buttons can be used for additional functions. These buttons can be programmed by the system administrator and, for some functions, the extension user.
•Button Numbering
All buttons are numbered from 01, from left to right, starting from the bottom row up.
•PBX Mode
•01-03 (ETR 01-02): Call Appearance Buttons
The first three buttons (two only on ETR phones) are used call appearance buttons for making and answering calls. They can be used for both internal and external calls. This function is automatically assigned to the buttons by the system and cannot be overridden by the system administrator or extension user.
•Other Buttons
Any additional buttons can be used for additional functions. These buttons can be programmed by the system administrator and, for some functions, the extension user.
•Button Numbering
All buttons are numbered from 01, from left to right, starting from the bottom row up. However for 1400, 9400 and 9500 Series telephones, buttons are numbered from 01 from left to right, starting from the top row downwards.
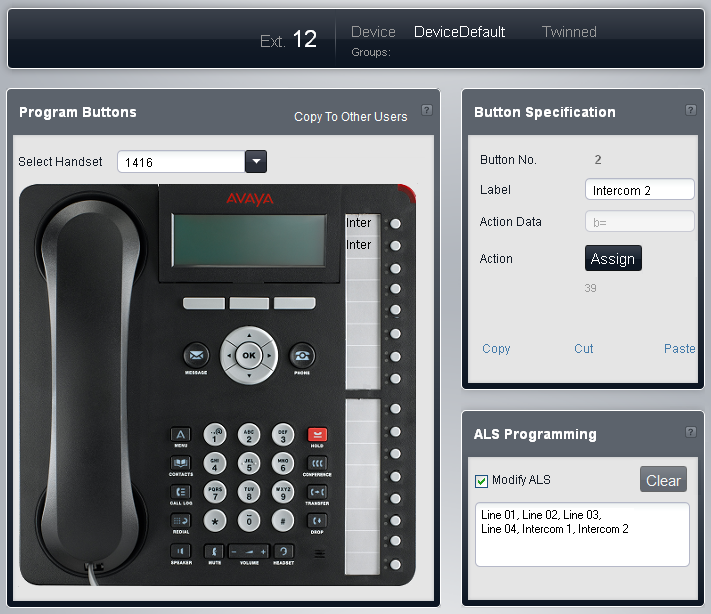
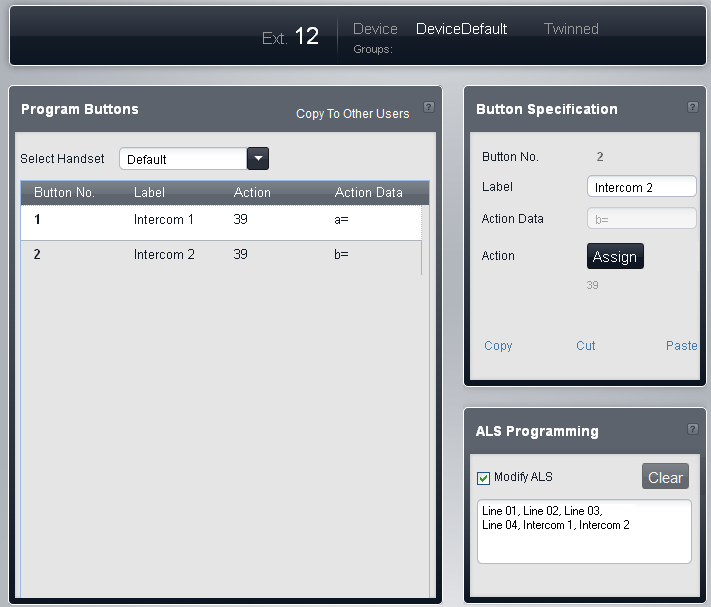
The menu can operate in either of two ways, depending on whether the phone type is known or not. If the phone type is known, for 1400 Series phones a picture of the phone is used. If the phone type is not known and for non-1400 Series phones, a list of buttons is used.

Button programming menu in picture mode.

Button programming menu in list mode.
Program Buttons
This table displays the list of features programmed on each of the user's buttons.
•Select Handset
If the type of telephone connected to the user's extension is known, it is shown here and the menu displays a picture of the phone buttons. If the telephone type is not known, the field display Default and a list of the current button settings. You can use the selector to choose whether you want to program the buttons using the picture or list mode.
•Button No
The button to which the feature is programmed. The position of the button will vary depending on the type of phone.
•Label
If the phone displays text labels next to each button, you can enter the text that should be displayed. To enter the label, click on the label space after having selected the action for the button.
•Action:
This is the action performed by the button when pressed. To select the action place your cursor in the box, right click and select Assign a Feature from the drop menu. This will display a menu from which you can select the feature required.
•Action Data
For some actions, when selecting the action you are asked to enter action data.
•Copy to Other Users
Displays a list of users and allows you to select which the users to which you want the current users buttons copied.
Button Specification
This panel displays the setting of the currently selected button. To change the currently selected button, click on a button on the telephone picture or click on a row in the list of buttons.
To change the buttons action, click on the Assign Feature button. For a summary of the possible features, see Programming Features, System Features and Line Assignment.
ALS Programming
Automatic line selection is used to select which available line is used when the extension goes off hook to make a call without the user first pressing a specific line or intercom button, for example if the user just lifts the handset or presses the speaker button. By default all analog line buttons (lowest to highest) and the two intercom buttons are used in that order.
•Modify ALS Programming: Default = Off.
If Modify ALS Programming is selected, the order of line selection is displayed and can be edited.
