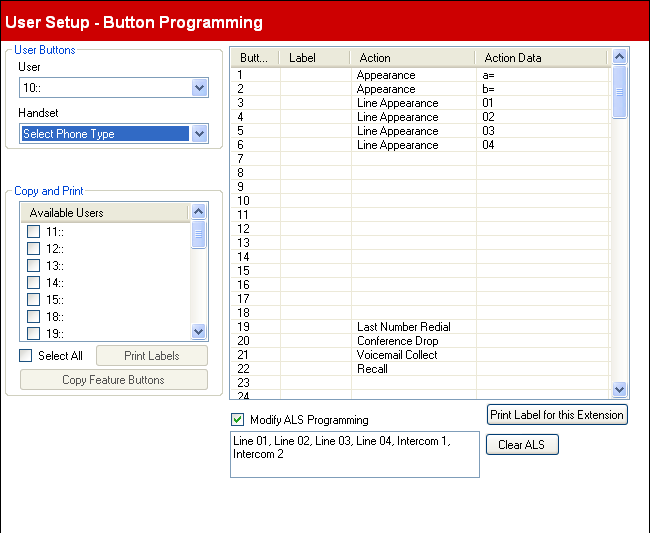
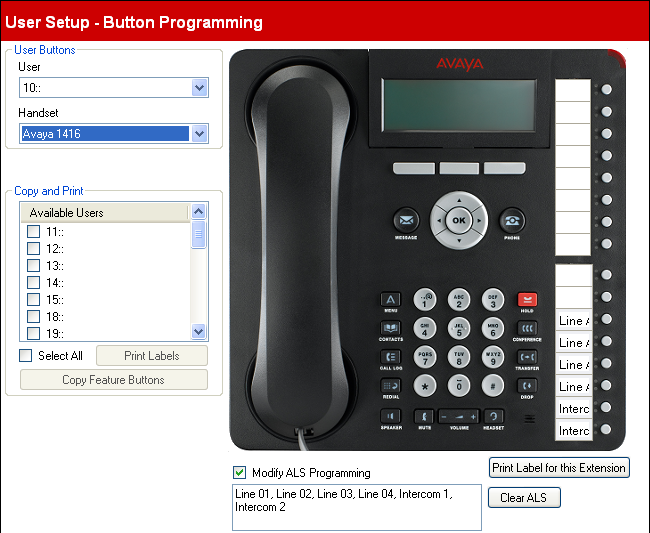
This menu is accessed from the System page by selecting Configure User Button Programming. |
This menu is accessed from the Admin Tasks list by selecting User Setup | Button Programming. |
Most Avaya phones have programmable buttons to which a variety of functions can be assigned. This menu can be used to edit the button settings. It can also be used to adjust the automatic line selection order used by the phone.
•Note that for systems running in Key System mode, a number of each users programmable buttons are automatically configured as line appearance button according to the system Number of Lines setting. If the system setting Number of Lines is changed, it may overwrite all or some of the current button programming.
The menu can operate in either of two ways, depending on whether the phone type is known or not. See the Handset setting.

Non-Graphical Mode
(Unknown phone type)

Graphical Mode
(Known phone type)
User Buttons
•User
This drop down list is used to select the extension user whose programmed buttons are displayed for editing.
•Handset
When a configuration is loaded from the telephone system at Manager start-up, if the type of phone currently plugged into the extension port is recognized, the menu switches to graphical mode and displays a picture of the phone. If the phone type is not known, the menu can either be used in non-graphical mode or a phone type can be selected from the drop down list to switch to graphical mode.
•For some phones the system can only detect the likely type. For example, M7100, M7100N, T7100 or ACU telephones are all initially listed as being an M7100. The drop-down list allows selection of the exact model if required.
Copy and Print
This section of the menu allows you to copy the current user's button program settings to other extension users.
•Available Users
Select the users to which you want apply either of the actions below.
•Copy Feature Buttons
Displays a list of users and allows you to select which the users to which you want the current users buttons copied.
•Print Labels
If you have the DESI label printing application installed on the computer, this control offers a list of connected printers and transfers the information required to print labels to the selected machine.
Button Programming (Non-Graphic Mode)
This table is shown in the non-graphic mode of operation. It displays the list of features programmed on each of the possible buttons.
•Button
The button to which the feature is programmed. The position of the button will vary depending on the type of phone.
•Label
If the phone displays text labels next to each button, you can enter the text that should be displayed. To enter the label, click on the label space after having selected the action for the button.
•Action
This is the action performed by the button when pressed. To select the action place your cursor in the box, right click and select Assign a Feature from the drop menu. This displays a menu of available button features. See Programming Features in the next section.
•Action Data
For some actions, when selecting the action you are asked to enter action data.
Button Programming (Graphic Mode)
When a image of the telephone type is displayed, button programming is performed by clicking on the image.
•To select the button function:
Right-click on the button and select Assign a Feature from the drop down menu. This displays a menu of available button features. See Programming Features in the next section. If the feature requires action data, the menu prompts you to select or enter the data after selecting the feature.
•To change the button label:
By default the button label is set automatically to match the selected button feature. To change the label, click on the label area next to the button.
Other Controls
•Modify ALS Programming: Default = Off.
Automatic line selection is used to select which available line is used when the extension goes off hook to make a call without the user first pressing a specific line or intercom button, for example if the user just lifts the handset or presses the speaker button. By default all analog line buttons (lowest to highest) and the two intercom buttons are used in that order. If Modify ALS Programming is selected, the order of line selection is displayed and can be edited.
•Print Label for this Extension
If you have the DESI label printing application installed on the computer, this control transfers the information required to print labels for the current user.
